Showing posts with label CSS. Show all posts

Friday, 7 August 2015

How to make a div scroll-able?


To make div horizontally scroll-able add overflow-x:scroll style to div as:


<div style="overflow-x: scroll; width: 300px;">
In HTML, span and div elements are used to define parts of a document so that they are identifiable when no other HTML element is suitable.
<div>


To make div vertically scroll-able add overflow-y:scroll style to div as:


<div style="overflow-y: scroll; height: 300px;">
In HTML, 
span and div elements are used 
to define parts of a document 
so that they are identifiable 
when no other HTML element is suitable. 
<div>


To make div  scroll-able both horizontally & vertically then  add overflow:scroll style to div as:


<div style="overflow: scroll; height: 300px; width:400px;">
In HTML, 
span and div elements are used 
to define parts of a document 
so that they are identifiable 
when no other HTML element is suitable. 
<div>

Thursday, 14 May 2015

Blinking Effect by Css


To use above effect just write down the following CSS rules in HEAD section or in external css file :


.blinking{
    animation-name: blinking;   /*  animation name which is attached to .blinking class */
    animation-duration:1s;
      animation-iteration-count:infinite;   /*this effect will run for infinite times*/
      animation-direction: alternate;  

}


@keyframes blinking {
      from {
        opacity:1;
    }

    to {
        opacity:0.7;
    }
}

@-moz-keyframes blinking {
    from {
        opacity:1;
    }

    to {
        opacity:0.7;
    }
}

@-webkit-keyframes blinking {
     from {
        opacity:1;
     }

    to {
        opacity:0.7;
    }
}


After that just assign the class="blinking" to any HTML element to have this effect. To use this in ASP.NET add:

CssClass="blinking"

Note: Sometimes animations not work on Google Chrome, So use Mozilla Firefox

Thursday, 26 March 2015

How to disable copying of text from a webpage?


To disable copying of text from a web page write the following script in HEAD section of web page:


Friday, 27 February 2015

Css Notification Boxes

Today we are going to look at the design of CSS Notification Boxes. Notification or Alert Boxes are a great way to inform the user of a variety of messages, such as: error messages, success messages, warning messages and general notification. A great example for using these notification boxes would be for user registrations for a website, if for example the user made an error during registration, you could use an alert box to inform the user of the particular error. If however everything was correct, you could alert the user that registration has succeeded and that they can now login.
In this tutorial, we are going to look at how to create a range of the most popular notification boxes, today we are going to focus on the following:
1. Error Box
2. Success Box
3. Warning Box
4. Notice Box
CSS Notification Boxes

Step 1:

First we will create the basic layout for each box.

.alert-box {
    color:#555;
    border-radius:10px;
    font-family:Tahoma,Geneva,Arial,sans-serif;font-size:11px;
    padding:10px 10px 10px 36px;
    margin:10px;
}

Lets take a look at each line:
color:#555; – This is used for the text color.
border-radius:10px; – We will give the borders a radius of 10px.
font-family:… – Is the name of the font that we will be using.
padding:10px 10px 10px 36px; – Padding inside the box, 10px for Top, Right and Bottom, 36px for Left.
margin:10px; – The margin around the box will be 10px.

Step 2:

In each box there will be a span property notifying the user of the alert.

.alert-box span {
    font-weight:bold;
    text-transform:uppercase;
}

Lets take a look at each line:
font-weight:bold; – All the text inside the span property will be bold.
text-transform:uppercase; – This will transform the text to uppercase.

Step 3:

Now lets add some color and icons to each box.

.error {
    background:#ffecec url('images/error.png') no-repeat 10px 50%;
    border:1px solid #f5aca6;
}
.success {
    background:#e9ffd9 url('images/success.png') no-repeat 10px 50%;
    border:1px solid #a6ca8a;
}
.warning {
    background:#fff8c4 url('images/warning.png') no-repeat 10px 50%;
    border:1px solid #f2c779;
}
.notice {
    background:#e3f7fc url('images/notice.png') no-repeat 10px 50%;
    border:1px solid #8ed9f6;
}

Lets take a look at each line:
background:… – Specifies the background color and the icon used for the alert
border:… – Specifies the border width, style and color.

Step 4:

Lastly we need some HTML code to display the alert boxes.


<div class="alert-box error"><span>error: </span>Write your error message here.</div>
<div class="alert-box success"><span>success: </span>Write your success message here.</div>
<div class="alert-box warning"><span>warning: </span>Write your warning message here.</div>
<div class="alert-box notice"><span>notice: </span>Write your notice message here.</div>

Saturday, 31 January 2015

Drop Down Menu using CSS


Click here to watch video!!!

DropDown.aspx File:

<%@ Page Language="C#" AutoEventWireup="true" CodeBehind="DropDown.aspx.cs" Inherits="DropDownMenuDemo.DropDown" %>

<!DOCTYPE html>

<html xmlns="http://www.w3.org/1999/xhtml">
<head runat="server">
    <title>Drop Down Menu Demo</title>
    <link href="menu.css" rel="stylesheet" />
</head>
<body>
    <form id="form1" runat="server">

        <div id="menu">
            <ul>
                <li>
                    <a href="#">Home1</a>
                    <ul>
                        <li><a href="#">Page 1</a></li>
                        <li><a href="#">Page 2</a></li>
                        <li><a href="#">Page 3</a></li>
                    </ul>
                </li>

                <li>
                    <a href="#">Home2</a>
                    <ul>
                        <li><a href="#">Page 1</a></li>
                        <li><a href="#">Page 2</a></li>
                        <li><a href="#">Page 3</a></li>
                    </ul>
                </li>

                <li>
                    <a href="#">Home</a>                
                </li>
            </ul>

        </div>
    </form>
</body>
</html>


menu.css File:


        #menu{
            width:450px;
            margin-left:auto;
            margin-right:auto;
        }
        #menu ul{
            margin:0px;
            padding:0px;
            list-style-type:none;
        }

        #menu ul li{
            background-color:blue;
            position:relative;
            float:left;
        }
        #menu ul li ul li{
            background-color:black;
        }
        #menu ul li a{
            text-decoration:none;
            display:block;
            width:150px;
            height:30px;
            line-height:30px;
            text-align:center;
            color:cornsilk;
        }
        #menu ul li ul li a{
            width:200px;
        }
        #menu ul ul{
            position:absolute;
            visibility:hidden;
        }
        #menu ul li:hover ul{
            visibility:visible;
        }

        #menu ul li:hover{
            background-color:black;
        }

        #menu ul li ul li a:hover{
            background-color:yellow;
            color:black;
            border:1px solid black;
            margin-left:-1px;
        }


Thursday, 22 January 2015

Styled Textbox using CSS


The following CSS will style the textbox.

.styled-textbox{
    border:1px solid #d1c7ac;
    width: 200px;
    height:30px;
    padding:5px;
    background: -moz-linear-gradient(center top , #FFF, #EEE 1px, #FFF 25px) repeat scroll 0% 0% transparent;
}
.styled-textbox:hover{
    border:1px solid #25A6E1;
}
.styled-textbox:focus{
box-shadow: 0px 0px 5px #00AFC7;
 border:1px solid #25A6E1;
}

Preview:


Now to style any textbox as above add above css class(.styled-textbox) to it .For example:

In HTML:
<input type="text" id="textbox1" placeholder="Type Here" class="styled-textbox" />

In ASP.NET:
<asp:Textbox ID="Button1" runat="server" placeholder="Type Here" CssClass="styled-textbox" />

Styled button using CSS


The following css class will style the button.


.styled-button-green {
    background:#5CCD00;
    padding:10px 15px;
    color:#fff;
    font-family:'Helvetica Neue',sans-serif;
    font-size:16px;
    border-radius:5px;
    border:1px solid #459A00
}


Preview:


Now to style any button, assign the above css class(styled-button-green) to the button. For example:

In HTML:
<input type="button" id="Button1" class="styled-button-green" />

In ASP.NET:
<asp:Button ID="Button1" runat="server" CssClass="styled-button-green" />

Lengths and percentages in CSS


There are many property specific units for values used in CSS, but there are some general units that are used in a number of properties.

em
em is unit for the calculated size of a font. For example:
font-size:2em;
Here 2em, is two times the current font size.

px
px is unit for pixels. For example:
font-size:20px; 

pt
pt is unit for points. For example:
font-size:20pt; 

%
% is unit for percentage. For example:
font-size:20%;

Other units include pc(picas), cm(centimetres), mm(millimetres) and in(inches).

When a value is zero, you need not to state a unit.

It is generally accepted that 'em' or '%' are the best units to use for font-sizes, rather than 'px', which leads to non-resizable text in most browsers.

CSS Selectors, Properties, and Values


Selectors


Whereas HTML has tags, CSS has selectors. Selectors are the names given to styles in internal and external style sheets.

Tag Selector

We can use HTML tags as CSS selectors. For example:

p{
color: blue;
}

Here all HTML 'p' tags are referenced. It will make the font-color of each p tag as blue

Another example inculde:

body{
backround-color:blue;
}


ID selector

We can assign a HTML tag a ID and then can use it as a selector. For example:

<P id="Para1">This is a paragraph</P>

then we can use it as:

#Para1{
color:blue;
}

# is necessary. ID should be unique, i.e. no two tags can have same ID


Class Selector

We can assign a class to HTML tags and then can use it as a selector. For example:

<P class="P1">Paragraph1</P>
<P class="P1">Paragraph2</P>
<P>Paragraph3</P>

then we can use it as:

.P1{
color:blue;
}

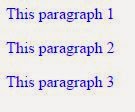
It will be as:

Paragraph1
Paragraph2
Paragraph3


Properties

For each selector there are properties inside curly brackets, which simply take the form of words such as color,background-color, font-size etc.

These are the properties of HTML tags which can be changed. For example, to change the color of text use 'color' , to change the size of text use 'font-size' , to change the background color use 'background-color' and many more.


Values

A value is given to the properties following a colon, and semicolon seperates the properties. For example:

body{
font-size:0.8em;
color:blue;
}


Syntax of CSS

Syntax of css is:

selector{
property1:value;
property2:value;
..
..
propertyN:value;
}

CSS syntax includes the following things:
  • Selector
  • Property
  • Value

What is Selector, Property, Value?

Monday, 19 January 2015

What is External Style Sheet?


Click here to watch video now!!!

An external style sheet is a text document (file) containing the style definition. External Style sheets are used to control the style for entire website.
For example:

----external.html----

<HTML>
<HEAD>
<TITLE>External Style Sheet</TITLE>
<LINK href="style.css" rel="Stylesheet"></LINK>
</HEAD>
<BODY>
<P>This is Paragraph 1</P>
</BODY>
</HTML>


---style.css---

p{
color:blue;
}


What is Embedded or Internal Style Sheet?


Click here to watch video now!!!

Embedded or internal style is applied to the entire HTML file. It is used when you need to modify all instances of a particular element in a web page.
For example:


<HTML>
<HEAD>
<TITLE>Internal Style Sheet</TITLE>
<STYLE type="Text/CSS">
p{
 Color: blue;
}
</STYLE>
</HEAD>
<BODY>
<P >This paragraph 1</P>
</BODY>
</HTML>


What is Inline Style Sheet?


Click here to watch Video now!!!

Inline Style Sheet is the most basic style sheets used, which can be applied to individual elements in the web page. Inline styles are implemented by using style attribute with HTML tags. Inline styles are used when you just need to format just a single section in a web page.
For example:

<HTML>
<HEAD>
<TITLE>Inline Style Sheet</TITLE>
</HEAD>
<BODY>
<P >This is simple paragraph.</P>
<P style="color:Blue">This is paragraph with inline style.</P>
</BODY>
</HTML>


Types of stylesheets

What is Cascading Style Sheets (CSS)?


A Style Sheet Language, or style language, is a computer language that expresses the presentation of structured documents. One attractive feature of structured documents is that the content can be reused in many contexts and presented in various ways. Different style sheets can be attached to the logical structure to produce different presentations.

Style Sheets enforce standards and uniformity throughout a website. 

Style Sheets are said to cascade when they combine to specify the appearance of a page.

Cascading Style Sheets (CSS) is a style sheet language used for describing the look and formatting of a document written in a markup language. While most often used to change the style of web pages and user interfaces written in HTML and XHTML, the language can be applied to any kind of XML document, including plain XML, SVG and XUL. Along with HTML and JavaScript, CSS is a cornerstone technology used by most websites to create visually engaging webpages, user interfaces for web applications, and user interfaces for many mobile applications.